9.30.2013

Mason Jar Caramel Apple Pie {with Streusel Topping}

To me, September is synonymous to apples and October is synonymous to Pumpkins.
So, on this last day of Septemeber, I thought I would share one of my favorite & most delicious recipes that uses Apples.
 Here is what you need:
  •  Wide Mouth Half Pint Mason Jars (you can get some at your grocery store or here) 
(You will need 8 wide mouth mason jars for this recipe)
For the filling:
  •  Package of pre-made pie dough (you will use both rolls of pie dough in the package)
  •  4 - 6 apples, peeled & diced (I usually use Granny Smith or Honey Crisp or a combo)
  • 1/2 cup granulated Sugar
  • 2 T flour
  • 1 t ground cinammon
  • 1/4 t ground nutmeg
  • 1/4 t ground cloves
  • Caramel Sauce
Streusel Topping:
  • 1/2 cup Oatmeal 
  • 1/2 cup Brown Sugar
  • 1/4 cup flour
  • 1/2 stick of butter, melted
 Directions:
Unroll your dough (The package comes with 2, you will use both)
Tear up the dough & line the inside of your mason jar:
Now, it's time to prepare the apples!
 Peel your apples:
 Then, dice them up. Normally for apple pie, I do slices, but because these are in a mason jar, I dice them up.
 Place in a bowl:
  Add the 1/2 cup of white sugar, 2 T flour, 1 t ground cinammon, 1/4 t ground nutmeg & 1/4 t ground cloves:
 Stir to coat:
 Now you are going to add the apple filling to the mason jars.
 Each jar gets 1/2 cup of apple filing:
 YUM.
 But, now it gets yummier. Get your caramel sauce:
 You are now going to drizzle some caramel sauce on top of the apple filling.
So much yum.
 Come to mama!
Just when you thought it couldn't get yummier, it does. Now you are going to make your streusel topping.
Add your 1/2 cup Oatmeal, 1/2 cup Brown Sugar  & 1/4 cup flour to a bowl.
Melt 1/2 stick of butter & stir it all up.
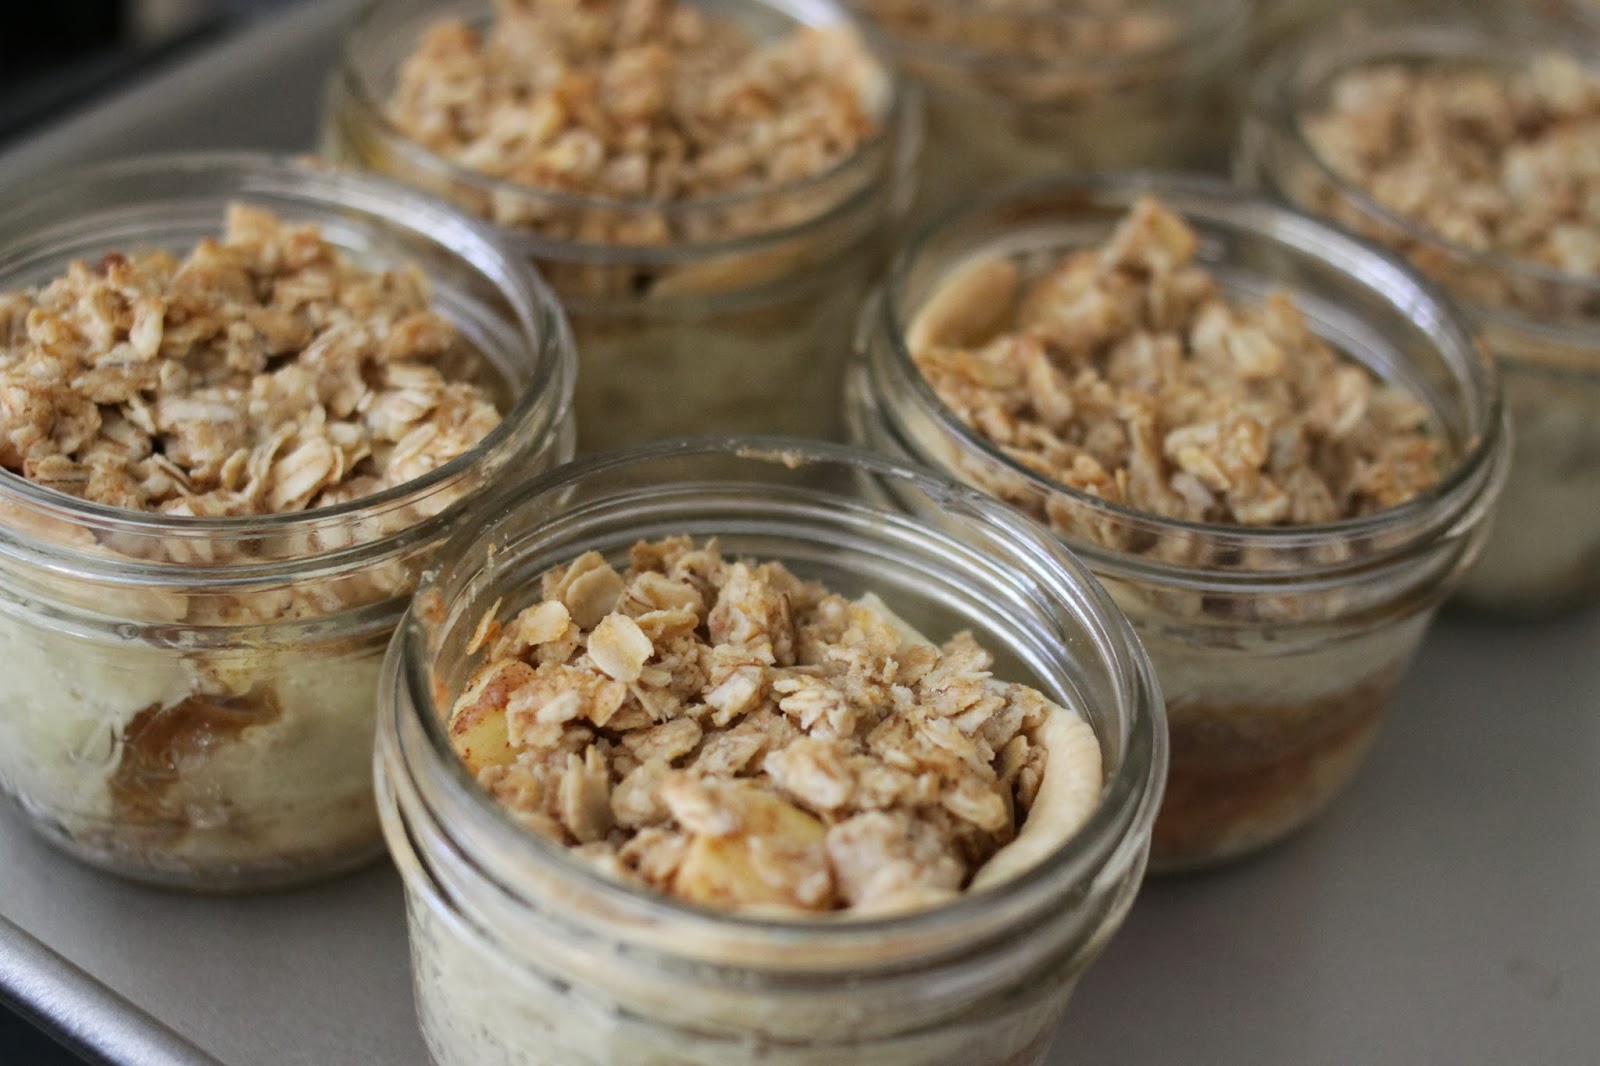
Add a few spoonfuls to the top of your pies.
 Divine.
Place your 8 mason jars on a cookie sheet. Bake for 45 minutes in a 375 degree oven.
 Let them cool for a bit before you serve them (so that the jars aren't too hot to handle)
 The yummy caramel melts all nice in the jar.
 When you are ready to serve these, add a scoop of vanilla ice cream on top & drizzle a little more caramel on top.
Is your mouth watering yet?
 Don't you want a bite?!?!?
 These are seriously SO good. And, pretty easy to make!
 These little mason jar pies are a perfect fall dessert! 
Actually, they would be really fun for 4th of July also.
It is a great dessert to make if you are having people over for dinner.
You can make them ahead of time & then when it's time to serve, just add the ice cream & caramel.
And, they are just so fun to eat out of!
I also think these would make a fun gift to give to a teacher, neighbor or friends.
Just put the lid on it & tie a bow on it (and add a spoon)
Viola! Cute little treat!
I think I need to make a cute tag for these....stay tuned :)

Let me know if you make these!
Enjoy!

And, as a reminder....tomorrow is October 1st 
(one of my favorite days of the year!!!! My favorite month!)
October 1st means our Pin-Spired linky will be up! 
Can't wait to see your Pinterest Inspired outfits!


9.26.2013

Twelve Things on a Thursday.

How about some Thursday randomness?

Here are 12 random things I am thinking about:

{ONE}
It's FALL Y'ALL. 
My favorite, favorite, favorite season of them all.
This week has been a great week.
 Mostly because of my attitude change and my giddiness that Fall is HERE!!!!!!! 
Cooler temps. Crisp Air. PUMPKINS.
Trader Joe's had their pumpkin food display out. Made my heart happy.
FALL! FALL! FALL!
YAY! YAY! YAY!

{TWO}
I forgot to put in my earrings earlier this week. 
I went the whole day without wearing earrings. 
 I am wore my necklace, rings, my bracelets (and clothes) but without earrings, I feel naked.
 
Anyone else have those issues like me?

{THREE}
Little Boy clothes are growing on me.
Plaid shirts & cargo pants.
And, little converse. I die of cuteness.

So dang adorable.

{FOUR}
It rained on the first day of Fall. Like, a crazy rain. We don't get rain in California in September, EVER. The girls were in heaven splashing in puddles.

Know who wasn't in heaven? My sister, Rebecca.
My nephew Jack turned 1 last week & his party was on Saturday & was supposed at a park.
Massive Rain = No party at a park. Kevin and I offered to have it at our house.
It was fun. Here is a sneak peek:
I took TONS of pics. But haven't uploaded them yet.
(Sorry, sister....I'll get them to you this weekend...)


{FIVE}
These nude/gold flats are one of my current favorite shoes. 
LOVE them. Real leather & under 40.
I wear them 1-2 times a week.

Get them HERE.

{SIX}
Have you entered my giveaway to win a Keurig & Green Mountain Coffee? 
 Enter HERE!

{SEVEN}
I thought this was a bag of normal candy corn. Turns out it was candy corn/peanut mix. IT IS AMAZING.

So good. What a happy accident. Go buy some. Now.


{EIGHT}
Pin-Spired will be this Tuesday, October 1st! 
 Link up your Pinterest Inspired outfits with me, Sheaffer & Shay!

{NINE}
This video. WRECKED me. 
Have tissues handy. Oh my word.
Watch it HERE.

{TEN}
It's almost October. That means, it's almost CROCK-TOBER!
My 3rd annual Crock Pot recipe link up will be on Monday, October 7th. 

You can check out the 2011 Crock-tober HERE
And, the 2012 Crock-tober HERE
Mark your calenders! 

{ELEVEN}
Have you been enjoying Fall TV Preimere week?
I have! Here are some highlights:
How I Met Your Mother. LOVED it.
New Girl. Week 2 didn't disappoint.
The Voice. Wasn't on my line up, but The Biggest Loser isn't starting for another few weeks & Kevin was working late on Tuesday and the Voice was on. Watched it & loved it. Need to watch more!
Lucky 7. It's new show, wasn't on my list to watch, but it somehow got DVR'd. I really liked it.
Low lights of Fall TV Priemere week:
Dads & Brooklyn Nine-Nine. Buh-Bye. You are out of my line up.

{TWELVE}
 I have the kids Halloween costumes all ready to go. A month ahead of schedule. 
We have a theme (again) I will milk a theme as long as I can with my kids.
The majority of their costumes are hand-me-downs. Score!
Can't wait. So excited. 
Here is a sneak peek.
Any guesses?!?!

Happy {almost} Weekend!

9.25.2013

Before & After: Backyard Edition, Phase 2

When we bought our house in May 2010, one of the first projects we tackled was the pool. 
The backyard was a disaster. It was 30 years of over growth & not being maintained.
The pool had issues. Major issues. Cracks. Leaks. Nastiness.
Here is what the pool looked like the day we moved in:
  It was a mess. The girls asked why we had a pond in our back yard.
The pool was lined with lava rock. Nasty.

The girls called the pool a "pond". There was NO way any of us would go in it.
We started demo on it the day we got the keys to the house.
Here was the after on Phase 1 of the Backyard/Pool Remodel:

SO MUCH BETTER, right?
One thing we DIDN'T redo right away was rip out all the overgrown bushes that lined our back fence.
If you see in the photo above, the original fence is about 1-2 feet shorter than our side fence.
This Spring we finally decided to rip out ALL the bushes that lined the back fence and replace the fence. We were reluctant to do that because it is a big project.
Check out the left side....overgrown bushes galore.
Over 130 feet of fence and bushes that were 35 years overgrown.
We liked having the protection of the bushes (since we back up to a walking trail/open space)
But, the horrible overgrown bushes had to go. They were ugly, dropped tons of leaves & berries and Kevin spent so much time cleaning up after them. I despised those bushes.
Those bushes also meant that one side of our pool was completely unusable.
There was no pool deck on the right hand side (see below on the right hand side). So annoying.

Last Fall & Winter, Kevin cut down all 130 feet of bushes.
 He started doing this in September 2012.
 Kate was bummed about us taking out the trees, because she loved climbing the trees.
 30 years of overgrown bushes. They were over 25 feet tall and 20 feet wide. Along 70 feet of fence.
Chop, Chop, Chop.
 It took him 5 months. Most weekends & many week nights he was out there chopping down those bushes/trees and then hauling them out to the the Green Trash Cans. He would borrow the Green Yard Trash Cans from 8 families on our court and put the remains of our bushes in our neighbors green trash cans.
Before:

 In April, after Kevin had cut everything down:
So happy to see all those bushed GONE!!!
 We had a guy come in and stump grind all 14 stumps from the bushes:

Kevin hauling away the final green trash can full of bushes:
Our plan was to get a new fence, that was 7 feet and to level out the backyard (it sloped about down 2 feet from the edge of the grass to the fence.
The fence company took 2 days, so it was crazy being so open that night without a fence completed.
People would walk by on the trail & just stare into the backyard. Creepy!
New fence in:
So much better without those awful bushes!
Along the pool, we were so excited to add more pool deck to make the pool area more functional.
Yay for cement!
We also extended the pool wall to reach the new fence.
Before:
After:
The new cement adds SO much more functionality!
Now we had room to add another table, chairs, an umbrella & some lounge chairs:

LOVE how it turned out. It was finished right before summer, so we were able to enjoy a functional pool area. So nice to have lounge chairs by the pool.
And, it is so nice to have pool deck go around the pool, and be able to walk around the pool & swim without those horrible awful bushes.
Kevin hung some planters on the fence for me, so I could add some color to the fence.
This was my view for most of the summer....chilling in a lounge chair & watching the kids swim :)
It has been so nice to have the patio, we host a lot of parties, especially pool parties and this extra area has been awesome!
I can't believe we didn't do this when we first re-did the pool, but we were on a budget....re-doing the pool was $$$$. We didn't realize that we would need more cement, neither of us had lived in a house with a pool, so we weren't thinking about functionality 3 years ago.  We realized after the first summer we needed to do this project, but adding a new 130 foot fence & more cement wasn't cheap, but we saved up and are SO happy with it.

 Here is a view of the rest of the fence:


 We planted 2 Japanese maples & a flowering cherry tree along the back fence. I can't wait for them to grow so that we have mature trees in our yard.
View from the other side of the yard:

Our next phase of the backyard that we want to re-do is the cement along the house & where our outside table it. It is old & cracked, so we to replace it.
 We are going to add another french door next to the window (right now it is just a wall, as you see in the pic below) 
We want to have more backyard access from the living room/dining room. That is a project we are hoping to do next Spring.

Since we bought this house in May 2010, we have officially torn out EVERY SINGLE thing in the backyard except this palm tree by the pool. And, we kept some of the grass (but had to re-seed/re-sod a lot of it)
It has been a labor of love. This is our final home and the home we call the money pit.
There was a lot of work to be done when we bought it and there is still some work to be done in the years to come.
We have other wish-list items for our backyard, like a fire pit, a built in BBQ/outside kitchen, but we aren't going to do any of that for a 4-5 more years (when the pool fence comes down).

So, for a recap......
BEFORE {May 2010}

{May 2011}:

AFTER {May 2013}

BEFORE {May 2010}


{May 2011}
AFTER {May 2013}
 I am very, very, very happy with our backyard update. I am so thankful for all of Kevin's hard work with this project.
 Here is what the other side of our yard looks like:
Kevin ripped it out the dead stuff & we added some landscaping & 3 crepe myrtle trees.
And, the final section of the backyard that Kevin slaved over is the side area.
BEFORE it was just a bunch of weeds & overgrown plum trees that didn't produce anything.
BEFORE:
Kevin spent months ripping it all out and building me garden boxes!
AFTER:
We also put in a little walkway around the garden boxes:
Close up of the garden boxes/walkway. Oh how I LOVE my garden!
 {You can see the entire Before & After of Phase 1 HERE.} 
It includes ALL the pics what what the backyard looked like when we first moved in.

LinkWithin

Blog Widget by LinkWithin